Best Spring Tree Seeds in 2026

Daisy
Last Updated: Jul 17, 2026
Daisy
Last Updated: Jul 17, 2026


* PickSmartly editors independently research, review, and endorse the top products through comprehensive data analysis. We may earn a commission for qualifying purchases made through our product links.
| SELLER | SELLER SCORE | AMAZON FULFILLED | PRIME | FREE SHIPPING |
|---|---|---|---|---|
| JOETTA IONE BRENNER LLC, | 9.68 | ✅ | ✅ | ✅ |
1. Choose the right containers: You can start seeds in almost any type of container, as long as it’s at least 2-3 '' deep and has some drainage holes. If you love to DIY by yourself, you might start growing seedlings in yogurt cups, milk cartons or even a paper cup.
2. The ''potting soil'': Choose the potting soil that’s made for growing seedlings.NOTE: Do not use soil from your garden or re-use potting soil from your houseplants.
3. Planting: Some of the small ones can be sprinkled right on the soil surface. Larger seeds will need to be buried. After planting seeds, you have to moisten the newly planted seeds. To speed up germination, cover the pots with wet paper or a plastic dome. This helps keep the seeds moist before they germinate. When you see the first signs of green, you have to remove the cover.
4. Watering, feeding, repeating: As the seedlings grow up, you have to keep the soil moist but not soggy. Let the soil dry slightly between waterings. Remember to feed the seedlings regularly with liquid fertilizer.
5. Light: Seeds need a lot of light. Set the lights on a timer for 15 hours a day. If you’re growing in a window, choose a south-facing exposure. Rotate the pots regularly to keep plants from leaning into the light. If you’re growing under lights, adjust them so they’re just a few inches above the tops of the seedlings. Keep in mind that seedlings need darkness, too, so they can rest. As the seedlings grow taller, raise the lights.
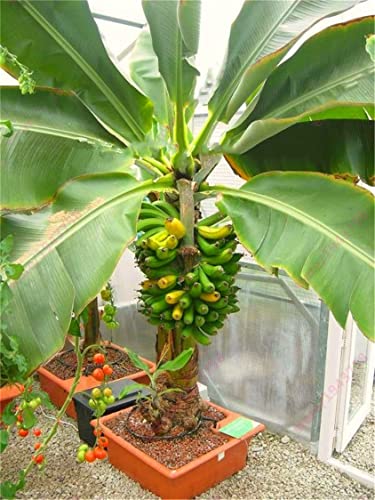
number of pieces: 10
| SELLER | SELLER SCORE | AMAZON FULFILLED | PRIME | FREE SHIPPING |
|---|---|---|---|---|
| JOETTA IONE BRENNER LLC, | 9.69 | ✅ | ✅ | ✅ |
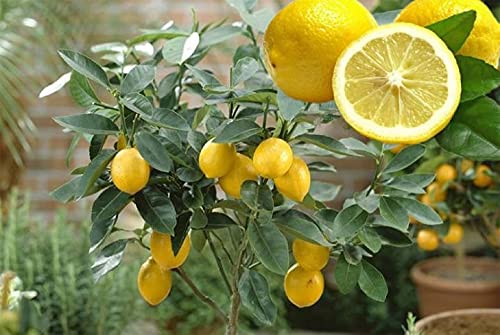
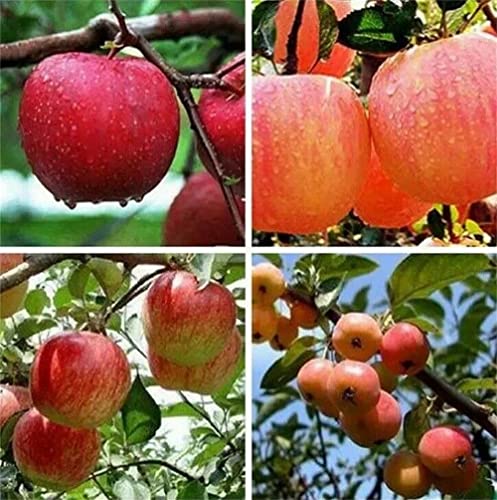
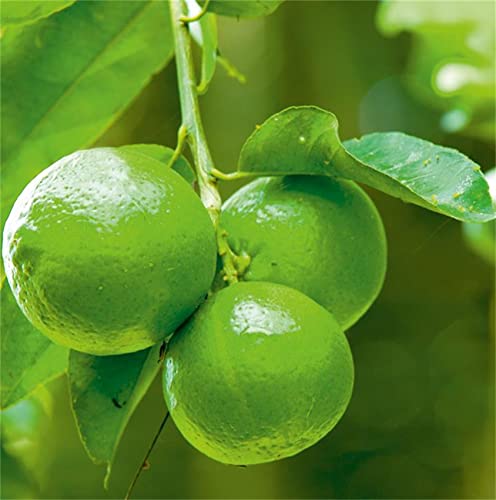
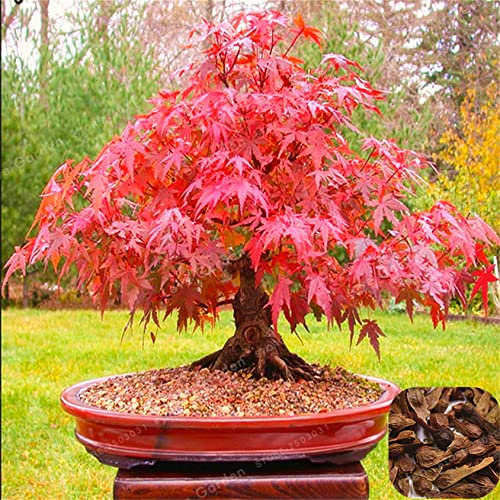
Degree:Very Easy, Climate:Temperate
Style:Perennial, Full-bloom Period:Spring, Cultivating Difficulty
Classification:Novel Plant, Function:Beautifying, Type:Landscape Plant
Use:Outdoor Plants, Variety:lemon
Product Type:Fruit seeds,
| SELLER | SELLER SCORE | AMAZON FULFILLED | PRIME | FREE SHIPPING |
|---|---|---|---|---|
| JOETTA IONE BRENNER LLC, | 9.71 | ✅ | ✅ | ✅ |
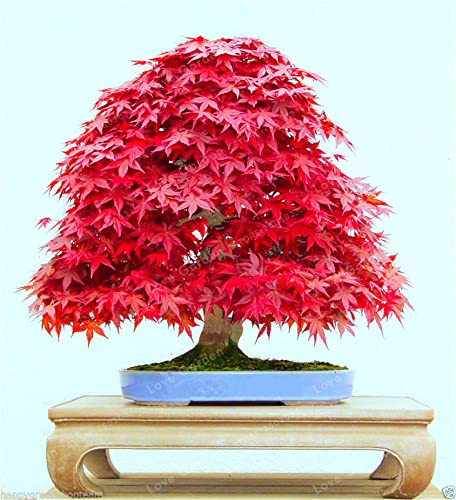
Acacia Dealbata Also known as: Silver Wattle, Blue Wattle, Mimosa
Native to southeastern Australia in New South Wales, Victoria, Tasmania, and the Australian Capital Territory and widely introduced in Mediterranean, warm temperate, and highland tropical landscapes.
| SELLER | SELLER SCORE | AMAZON FULFILLED | PRIME | FREE SHIPPING |
|---|---|---|---|---|
| JOETTA IONE BRENNER LLC, | 9.69 | ✅ | ✅ | ✅ |
1. Choose the right containers: You can start seeds in almost any type of container, as long as it’s at least 2-3 '' deep and has some drainage holes. If you love to DIY by yourself, you might start growing seedlings in yogurt cups, milk cartons or even a paper cup.
2. The ''potting soil'': Choose the potting soil that’s made for growing seedlings.NOTE: Do not use soil from your garden or re-use potting soil from your houseplants.
3. Planting: Some of the small ones can be sprinkled right on the soil surface. Larger seeds will need to be buried. After planting seeds, you have to moisten the newly planted seeds. To speed up germination, cover the pots with wet paper or a plastic dome. This helps keep the seeds moist before they germinate. When you see the first signs of green, you have to remove the cover.
4. Watering, feeding, repeating: As the seedlings grow up, you have to keep the soil moist but not soggy. Let the soil dry slightly between waterings. Remember to feed the seedlings regularly with liquid fertilizer.
5. Light: Seeds need a lot of light. Set the lights on a timer for 15 hours a day. If you’re growing in a window, choose a south-facing exposure. Rotate the pots regularly to keep plants from leaning into the light. If you’re growing under lights, adjust them so they’re just a few inches above the tops of the seedlings. Keep in mind that seedlings need darkness, too, so they can rest. As the seedlings grow taller, raise the lights.
number of pieces: 100
| SELLER | SELLER SCORE | AMAZON FULFILLED | PRIME | FREE SHIPPING |
|---|---|---|---|---|
| JOETTA IONE BRENNER LLC, | 9.71 | ✅ | ✅ | ✅ |
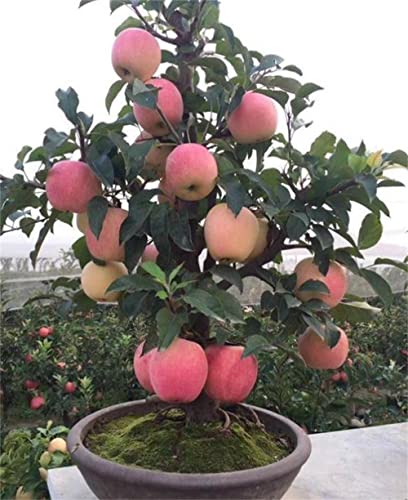
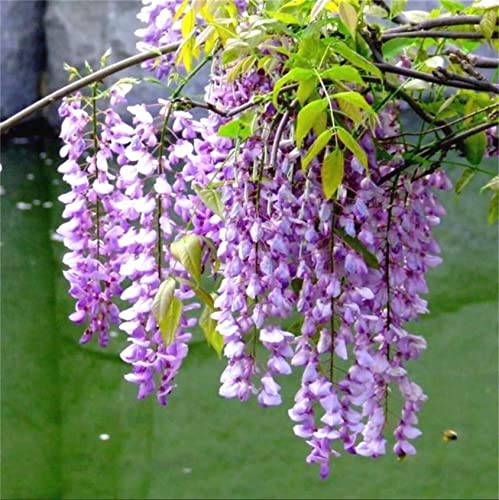
Quantity: 1 pack (about 30pcs seeds, due to manual counts, quantity will be 1-2pcs more or less. Make sure you don't mind before you buy, thank you!!!)
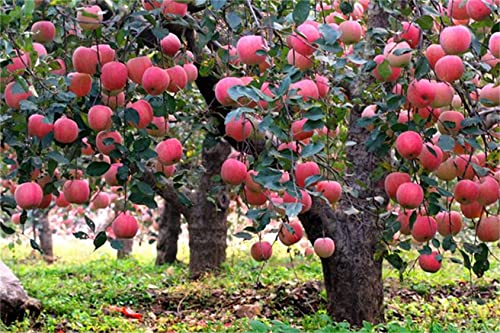
Columnar apple varieties no major crown, due to the small crown, thus saving space and acreage.
Another addition to its high yield and strong, the columnar growth characteristics of the decision it has high landscape value.
Ideal for gardens, parks, balconies and other small space were planted in a sunny place. In urban greening, columnar apple trees also by unparalleled advantage.
| SELLER | SELLER SCORE | AMAZON FULFILLED | PRIME | FREE SHIPPING |
|---|---|---|---|---|
| JOETTA IONE BRENNER LLC, | 9.69 | ✅ | ✅ | ✅ |
1. Choose the right containers:You can start seeds in almost any type of container, as long as it’s at least 2-3 ” deep and has some drainage holes. If you love to DIY by yourself, you might start growing seedlings in yogurt cups, milk cartons or even a paper cup.
2. The “potting soil”:Choose the potting soil that’s made for growing seedlings.NOTE: Do not use soil from your garden or re-use potting soil from your houseplants.
3. Planting:Some of the small ones can be sprinkled right on the soil surface. Larger seeds will need to be buried. After planting seeds, you have to moisten the newly planted seeds. To speed up germination, cover the pots with wet paper or a plastic dome. This helps keep the seeds moist before they germinate. When you see the first signs of green, you have to remove the cover.
4. Watering, feeding, repeating:As the seedlings grow up, you have to keep the soil moist but not soggy. Let the soil dry slightly between waterings. Remember to feed the seedlings regularly with liquid fertilizer.
5. Light:Seeds need a lot of light. Set the lights on a timer for 15 hours a day. If you’re growing in a window, choose a south-facing exposure. Rotate the pots regularly to keep plants from leaning into the light. If you’re growing under lights, adjust them so they’re just a few inches above the tops of the seedlings. Keep in mind that seedlings need darkness, too, so they can rest. As the seedlings grow taller, raise the lights.
| SELLER | SELLER SCORE | AMAZON FULFILLED | PRIME | FREE SHIPPING |
|---|---|---|---|---|
| ❌ | ❌ | ❌ |
1. Choose the right containers:You can start seeds in almost any type of container, as long as it’s at least 2-3 ” deep and has some drainage holes. If you love to DIY by yourself, you might start growing seedlings in yogurt cups, milk cartons or even a paper cup.
2. The “potting soil”:Choose the potting soil that’s made for growing seedlings.NOTE: Do not use soil from your garden or re-use potting soil from your houseplants.
3. Planting:Some of the small ones can be sprinkled right on the soil surface. Larger seeds will need to be buried. After planting seeds, you have to moisten the newly planted seeds. To speed up germination, cover the pots with wet paper or a plastic dome. This helps keep the seeds moist before they germinate. When you see the first signs of green, you have to remove the cover.
4. Watering, feeding, repeating:As the seedlings grow up, you have to keep the soil moist but not soggy. Let the soil dry slightly between waterings. Remember to feed the seedlings regularly with liquid fertilizer.
5. Light:Seeds need a lot of light. Set the lights on a timer for 15 hours a day. If you’re growing in a window, choose a south-facing exposure. Rotate the pots regularly to keep plants from leaning into the light. If you’re growing under lights, adjust them so they’re just a few inches above the tops of the seedlings. Keep in mind that seedlings need darkness, too, so they can rest. As the seedlings grow taller, raise the lights.
| SELLER | SELLER SCORE | AMAZON FULFILLED | PRIME | FREE SHIPPING |
|---|---|---|---|---|
| JOETTA IONE BRENNER LLC, | 9.70 | ✅ | ✅ | ✅ |
1. Choose the right containers: You can start seeds in almost any type of container, as long as it’s at least 2-3 '' deep and has some drainage holes. If you love to DIY by yourself, you might start growing seedlings in yogurt cups, milk cartons or even a paper cup.
2. The ''potting soil'': Choose the potting soil that’s made for growing seedlings.NOTE: Do not use soil from your garden or re-use potting soil from your houseplants.
3. Planting: Some of the small ones can be sprinkled right on the soil surface. Larger seeds will need to be buried. After planting seeds, you have to moisten the newly planted seeds. To speed up germination, cover the pots with wet paper or a plastic dome. This helps keep the seeds moist before they germinate. When you see the first signs of green, you have to remove the cover.
4. Watering, feeding, repeating: As the seedlings grow up, you have to keep the soil moist but not soggy. Let the soil dry slightly between waterings. Remember to feed the seedlings regularly with liquid fertilizer.
5. Light: Seeds need a lot of light. Set the lights on a timer for 15 hours a day. If you’re growing in a window, choose a south-facing exposure. Rotate the pots regularly to keep plants from leaning into the light. If you’re growing under lights, adjust them so they’re just a few inches above the tops of the seedlings. Keep in mind that seedlings need darkness, too, so they can rest. As the seedlings grow taller, raise the lights.
number of pieces: 20
| SELLER | SELLER SCORE | AMAZON FULFILLED | PRIME | FREE SHIPPING |
|---|---|---|---|---|
| JOETTA IONE BRENNER LLC, | 9.71 | ✅ | ✅ | ✅ |
1. Choose the right containers: You can start seeds in almost any type of container, as long as it’s at least 2-3 '' deep and has some drainage holes. If you love to DIY by yourself, you might start growing seedlings in yogurt cups, milk cartons or even a paper cup.
2. The ''potting soil'': Choose the potting soil that’s made for growing seedlings.NOTE: Do not use soil from your garden or re-use potting soil from your houseplants.
3. Planting: Some of the small ones can be sprinkled right on the soil surface. Larger seeds will need to be buried. After planting seeds, you have to moisten the newly planted seeds. To speed up germination, cover the pots with wet paper or a plastic dome. This helps keep the seeds moist before they germinate. When you see the first signs of green, you have to remove the cover.
4. Watering, feeding, repeating: As the seedlings grow up, you have to keep the soil moist but not soggy. Let the soil dry slightly between waterings. Remember to feed the seedlings regularly with liquid fertilizer.
5. Light: Seeds need a lot of light. Set the lights on a timer for 15 hours a day. If you’re growing in a window, choose a south-facing exposure. Rotate the pots regularly to keep plants from leaning into the light. If you’re growing under lights, adjust them so they’re just a few inches above the tops of the seedlings. Keep in mind that seedlings need darkness, too, so they can rest. As the seedlings grow taller, raise the lights.
number of pieces: 100
| SELLER | SELLER SCORE | AMAZON FULFILLED | PRIME | FREE SHIPPING |
|---|---|---|---|---|
| JOETTA IONE BRENNER LLC, | 9.70 | ✅ | ✅ | ✅ |
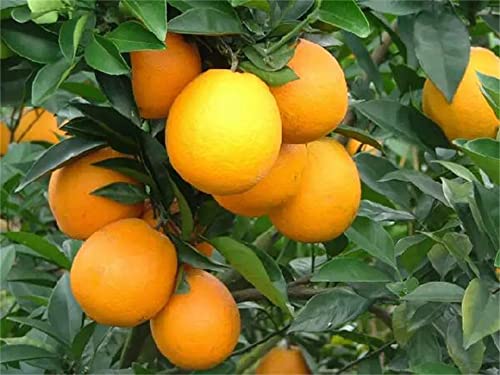
Easy to Grow Orange Tree Seeds. Grow as Bonsai or for food.
Turn Sew 1/2 deep in good organic soil. Keep the seed bed moist while the plants germinate.heads with this fast grower. Tasty Edible Fruit.
| SELLER | SELLER SCORE | AMAZON FULFILLED | PRIME | FREE SHIPPING |
|---|---|---|---|---|
| JOETTA IONE BRENNER LLC, | 9.73 | ✅ | ✅ | ✅ |
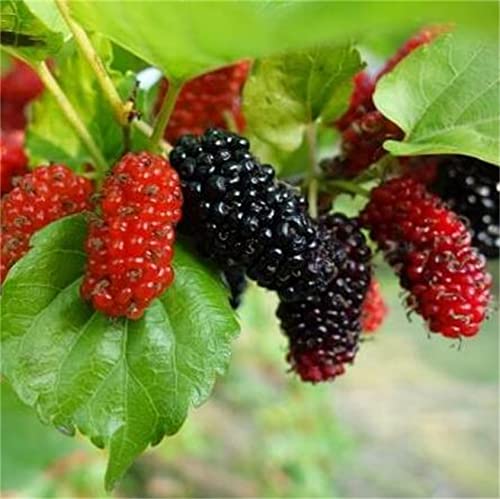
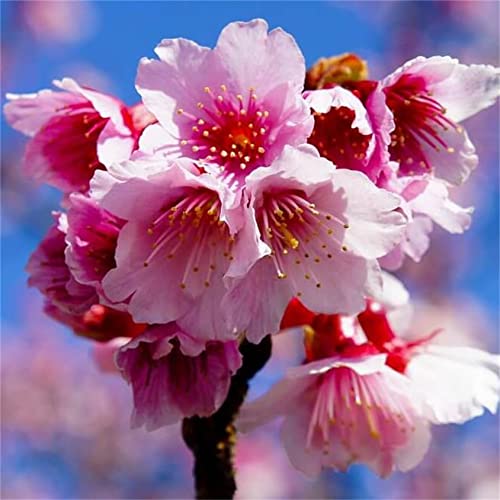
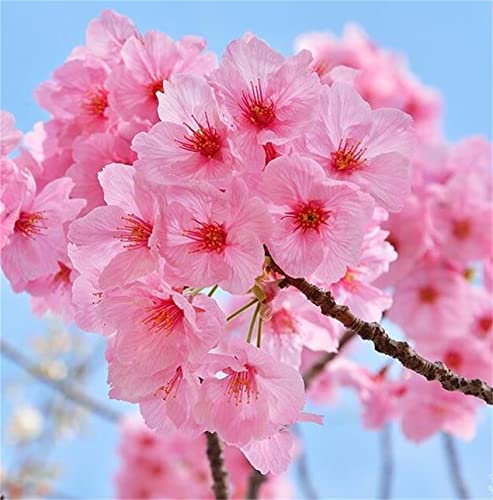
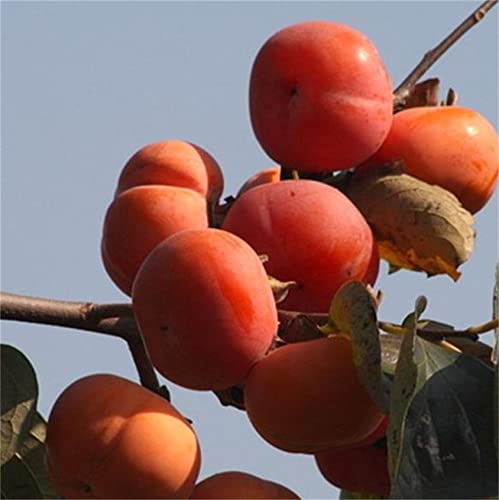
Cherry is a kind of plant, Rosaceae, deciduous tree Bai wood, bark purple brown, smooth luster, there are horizontal lines.
Flowers and leaves alternate, elliptic or obovate elliptic, margin awned teeth, apex pointed and glandular, surface dark green, glossy, back slightly pale.
Stipules lanceolate linear, margin serrate, with glandular end.
Each flower has three or five flowers, forming an umbel, sepals developed horizontally, petals with notch at the apex, white and red.
Flowers bloom with or after leaves in March. The nucleus is globose, initially red, then purple brown, and matures in July.
| SELLER | SELLER SCORE | AMAZON FULFILLED | PRIME | FREE SHIPPING |
|---|---|---|---|---|
| JOETTA IONE BRENNER LLC, | 9.71 | ✅ | ✅ | ✅ |
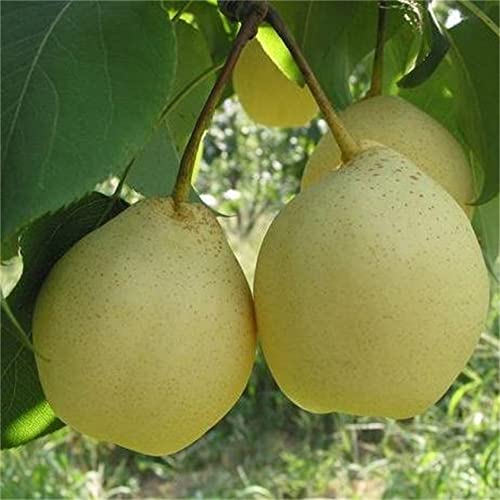
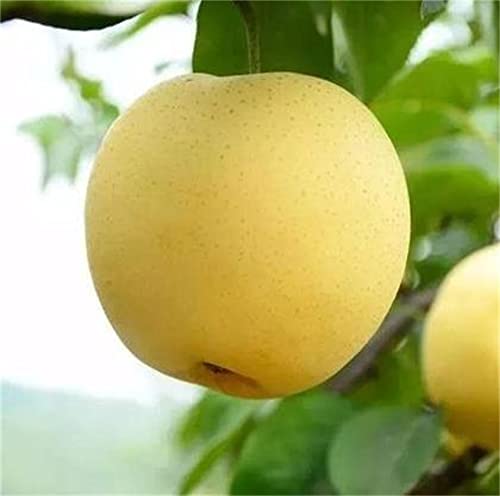
30 Dwarf Apple tree seeds.
These apple trees will thrive and stay small in a container or grow into a 10 foot tall tree when planted in the ground.
For best results, soak in water for 24 hours before planting.
Plant 1 inch below the soil and keep moist in a warm place.
| SELLER | SELLER SCORE | AMAZON FULFILLED | PRIME | FREE SHIPPING |
|---|---|---|---|---|
| JOETTA IONE BRENNER LLC, | 9.69 | ✅ | ✅ | ✅ |
1. Choose the right containers: You can start seeds in almost any type of container, as long as it’s at least 2-3 '' deep and has some drainage holes. If you love to DIY by yourself, you might start growing seedlings in yogurt cups, milk cartons or even a paper cup.
2. The ''potting soil'': Choose the potting soil that’s made for growing seedlings.NOTE: Do not use soil from your garden or re-use potting soil from your houseplants.
3. Planting: Some of the small ones can be sprinkled right on the soil surface. Larger seeds will need to be buried. After planting seeds, you have to moisten the newly planted seeds. To speed up germination, cover the pots with wet paper or a plastic dome. This helps keep the seeds moist before they germinate. When you see the first signs of green, you have to remove the cover.
4. Watering, feeding, repeating: As the seedlings grow up, you have to keep the soil moist but not soggy. Let the soil dry slightly between waterings. Remember to feed the seedlings regularly with liquid fertilizer.
5. Light: Seeds need a lot of light. Set the lights on a timer for 15 hours a day. If you’re growing in a window, choose a south-facing exposure. Rotate the pots regularly to keep plants from leaning into the light. If you’re growing under lights, adjust them so they’re just a few inches above the tops of the seedlings. Keep in mind that seedlings need darkness, too, so they can rest. As the seedlings grow taller, raise the lights.
number of pieces: 20
| SELLER | SELLER SCORE | AMAZON FULFILLED | PRIME | FREE SHIPPING |
|---|---|---|---|---|
| JOETTA IONE BRENNER LLC, | 9.68 | ✅ | ✅ | ✅ |
1. Choose the right containers: You can start seeds in almost any type of container, as long as it’s at least 2-3 '' deep and has some drainage holes. If you love to DIY by yourself, you might start growing seedlings in yogurt cups, milk cartons or even a paper cup.
2. The ''potting soil'': Choose the potting soil that’s made for growing seedlings.NOTE: Do not use soil from your garden or re-use potting soil from your houseplants.
3. Planting: Some of the small ones can be sprinkled right on the soil surface. Larger seeds will need to be buried. After planting seeds, you have to moisten the newly planted seeds. To speed up germination, cover the pots with wet paper or a plastic dome. This helps keep the seeds moist before they germinate. When you see the first signs of green, you have to remove the cover.
4. Watering, feeding, repeating: As the seedlings grow up, you have to keep the soil moist but not soggy. Let the soil dry slightly between waterings. Remember to feed the seedlings regularly with liquid fertilizer.
5. Light: Seeds need a lot of light. Set the lights on a timer for 15 hours a day. If you’re growing in a window, choose a south-facing exposure. Rotate the pots regularly to keep plants from leaning into the light. If you’re growing under lights, adjust them so they’re just a few inches above the tops of the seedlings. Keep in mind that seedlings need darkness, too, so they can rest. As the seedlings grow taller, raise the lights.
number of pieces: 20
| SELLER | SELLER SCORE | AMAZON FULFILLED | PRIME | FREE SHIPPING |
|---|---|---|---|---|
| JOETTA IONE BRENNER LLC, | 9.69 | ✅ | ✅ | ✅ |
1. Choose the right containers: You can start seeds in almost any type of container, as long as it’s at least 2-3 '' deep and has some drainage holes. If you love to DIY by yourself, you might start growing seedlings in yogurt cups, milk cartons or even a paper cup.
2. The ''potting soil'': Choose the potting soil that’s made for growing seedlings.NOTE: Do not use soil from your garden or re-use potting soil from your houseplants.
3. Planting: Some of the small ones can be sprinkled right on the soil surface. Larger seeds will need to be buried. After planting seeds, you have to moisten the newly planted seeds. To speed up germination, cover the pots with wet paper or a plastic dome. This helps keep the seeds moist before they germinate. When you see the first signs of green, you have to remove the cover.
4. Watering, feeding, repeating: As the seedlings grow up, you have to keep the soil moist but not soggy. Let the soil dry slightly between waterings. Remember to feed the seedlings regularly with liquid fertilizer.
5. Light: Seeds need a lot of light. Set the lights on a timer for 15 hours a day. If you’re growing in a window, choose a south-facing exposure. Rotate the pots regularly to keep plants from leaning into the light. If you’re growing under lights, adjust them so they’re just a few inches above the tops of the seedlings. Keep in mind that seedlings need darkness, too, so they can rest. As the seedlings grow taller, raise the lights.
number of pieces: 10
| SELLER | SELLER SCORE | AMAZON FULFILLED | PRIME | FREE SHIPPING |
|---|---|---|---|---|
| JOETTA IONE BRENNER LLC, | 9.68 | ✅ | ✅ | ✅ |
1. Choose the right containers:You can start seeds in almost any type of container, as long as it’s at least 2-3 ” deep and has some drainage holes. If you love to DIY by yourself, you might start growing seedlings in yogurt cups, milk cartons or even a paper cup.
2. The “potting soil”:Choose the potting soil that’s made for growing seedlings.NOTE: Do not use soil from your garden or re-use potting soil from your houseplants.
3. Planting:Some of the small ones can be sprinkled right on the soil surface. Larger seeds will need to be buried. After planting seeds, you have to moisten the newly planted seeds. To speed up germination, cover the pots with wet paper or a plastic dome. This helps keep the seeds moist before they germinate. When you see the first signs of green, you have to remove the cover.
4. Watering, feeding, repeating:As the seedlings grow up, you have to keep the soil moist but not soggy. Let the soil dry slightly between waterings. Remember to feed the seedlings regularly with liquid fertilizer.
5. Light:Seeds need a lot of light. Set the lights on a timer for 15 hours a day. If you’re growing in a window, choose a south-facing exposure. Rotate the pots regularly to keep plants from leaning into the light. If you’re growing under lights, adjust them so they’re just a few inches above the tops of the seedlings. Keep in mind that seedlings need darkness, too, so they can rest. As the seedlings grow taller, raise the lights.
| SELLER | SELLER SCORE | AMAZON FULFILLED | PRIME | FREE SHIPPING |
|---|---|---|---|---|
| JOETTA IONE BRENNER LLC, | 9.69 | ✅ | ✅ | ✅ |
1. Choose the right containers: You can start seeds in almost any type of container, as long as it’s at least 2-3 '' deep and has some drainage holes. If you love to DIY by yourself, you might start growing seedlings in yogurt cups, milk cartons or even a paper cup.
2. The ''potting soil'': Choose the potting soil that’s made for growing seedlings.NOTE: Do not use soil from your garden or re-use potting soil from your houseplants.
3. Planting: Some of the small ones can be sprinkled right on the soil surface. Larger seeds will need to be buried. After planting seeds, you have to moisten the newly planted seeds. To speed up germination, cover the pots with wet paper or a plastic dome. This helps keep the seeds moist before they germinate. When you see the first signs of green, you have to remove the cover.
4. Watering, feeding, repeating: As the seedlings grow up, you have to keep the soil moist but not soggy. Let the soil dry slightly between waterings. Remember to feed the seedlings regularly with liquid fertilizer.
5. Light: Seeds need a lot of light. Set the lights on a timer for 15 hours a day. If you’re growing in a window, choose a south-facing exposure. Rotate the pots regularly to keep plants from leaning into the light. If you’re growing under lights, adjust them so they’re just a few inches above the tops of the seedlings. Keep in mind that seedlings need darkness, too, so they can rest. As the seedlings grow taller, raise the lights.
number of pieces: 100
| SELLER | SELLER SCORE | AMAZON FULFILLED | PRIME | FREE SHIPPING |
|---|---|---|---|---|
| JOETTA IONE BRENNER LLC, | 9.67 | ✅ | ✅ | ✅ |
1. Choose the right containers: You can start seeds in almost any type of container, as long as it’s at least 2-3 '' deep and has some drainage holes. If you love to DIY by yourself, you might start growing seedlings in yogurt cups, milk cartons or even a paper cup.
2. The ''potting soil'': Choose the potting soil that’s made for growing seedlings.NOTE: Do not use soil from your garden or re-use potting soil from your houseplants.
3. Planting: Some of the small ones can be sprinkled right on the soil surface. Larger seeds will need to be buried. After planting seeds, you have to moisten the newly planted seeds. To speed up germination, cover the pots with wet paper or a plastic dome. This helps keep the seeds moist before they germinate. When you see the first signs of green, you have to remove the cover.
4. Watering, feeding, repeating: As the seedlings grow up, you have to keep the soil moist but not soggy. Let the soil dry slightly between waterings. Remember to feed the seedlings regularly with liquid fertilizer.
5. Light: Seeds need a lot of light. Set the lights on a timer for 15 hours a day. If you’re growing in a window, choose a south-facing exposure. Rotate the pots regularly to keep plants from leaning into the light. If you’re growing under lights, adjust them so they’re just a few inches above the tops of the seedlings. Keep in mind that seedlings need darkness, too, so they can rest. As the seedlings grow taller, raise the lights.
number of pieces: 20
| SELLER | SELLER SCORE | AMAZON FULFILLED | PRIME | FREE SHIPPING |
|---|---|---|---|---|
| JOETTA IONE BRENNER LLC, | 9.71 | ✅ | ✅ | ✅ |
1. Choose the right containers: You can start seeds in almost any type of container, as long as it’s at least 2-3 '' deep and has some drainage holes. If you love to DIY by yourself, you might start growing seedlings in yogurt cups, milk cartons or even a paper cup.
2. The ''potting soil'': Choose the potting soil that’s made for growing seedlings.NOTE: Do not use soil from your garden or re-use potting soil from your houseplants.
3. Planting: Some of the small ones can be sprinkled right on the soil surface. Larger seeds will need to be buried. After planting seeds, you have to moisten the newly planted seeds. To speed up germination, cover the pots with wet paper or a plastic dome. This helps keep the seeds moist before they germinate. When you see the first signs of green, you have to remove the cover.
4. Watering, feeding, repeating: As the seedlings grow up, you have to keep the soil moist but not soggy. Let the soil dry slightly between waterings. Remember to feed the seedlings regularly with liquid fertilizer.
5. Light: Seeds need a lot of light. Set the lights on a timer for 15 hours a day. If you’re growing in a window, choose a south-facing exposure. Rotate the pots regularly to keep plants from leaning into the light. If you’re growing under lights, adjust them so they’re just a few inches above the tops of the seedlings. Keep in mind that seedlings need darkness, too, so they can rest. As the seedlings grow taller, raise the lights.
number of pieces: 10
| SELLER | SELLER SCORE | AMAZON FULFILLED | PRIME | FREE SHIPPING |
|---|---|---|---|---|
| JOETTA IONE BRENNER LLC, | 9.71 | ✅ | ✅ | ✅ |
1. Choose the right containers:You can start seeds in almost any type of container, as long as it’s at least 2-3 ” deep and has some drainage holes. If you love to DIY by yourself, you might start growing seedlings in yogurt cups, milk cartons or even a paper cup.
2. The “potting soil”:Choose the potting soil that’s made for growing seedlings.NOTE: Do not use soil from your garden or re-use potting soil from your houseplants.
3. Planting:Some of the small ones can be sprinkled right on the soil surface. Larger seeds will need to be buried. After planting seeds, you have to moisten the newly planted seeds. To speed up germination, cover the pots with wet paper or a plastic dome. This helps keep the seeds moist before they germinate. When you see the first signs of green, you have to remove the cover.
4. Watering, feeding, repeating:As the seedlings grow up, you have to keep the soil moist but not soggy. Let the soil dry slightly between waterings. Remember to feed the seedlings regularly with liquid fertilizer.
5. Light:Seeds need a lot of light. Set the lights on a timer for 15 hours a day. If you’re growing in a window, choose a south-facing exposure. Rotate the pots regularly to keep plants from leaning into the light. If you’re growing under lights, adjust them so they’re just a few inches above the tops of the seedlings. Keep in mind that seedlings need darkness, too, so they can rest. As the seedlings grow taller, raise the lights.
Here is the list of top-rated brands that were evaluated by PM.
| Brand | Count |
|---|---|
| Zcbang | 21 |
We've carried out a comprehensive analysis of 421 reviews on tree seeds, using our selection criteria to identify the best options in the gardening & lawn care. Our findings reveal that most customers typically select tree seeds priced around $7.91, with top brands including cz grain, envy prime, braing food, sterwew, moccurod, · garden republic ·, seeds2go, gmbtho and seedsforbrains and s-pone
Our team of expert editors reviewed these high-quality items and handpicked the top 21 tree seeds for your consideration. We've also done extensive research on numerous sellers, identifying the best ones in the gardening & lawn care category. These include cz grain llc, envy prime, braing food, tanmay geargen23, rhino-rack usa llc, garden republic, seeds2go, the southfor23 and qo seeds and pqfrllcddk .
We are dedicated to assisting our users in finding the right seeds Products based on their needs, saving them considerable time when choosing which tree seeds to buy. We take pride in the number of satisfied users we've helped through our thorough and insightful reviews.

PickSmartly is dedicated to creating a platform designed to streamline your shopping experience, empowering you to make well-informed purchasing decisions with minimal time and effort. At the heart of our mission is the commitment to earning and maintaining the trust of our users, as we believe this to be fundamental to the services we provide.
When you engage with our websites, services, or tools, we or our approved service providers may utilize cookies to store information. This is done to enhance your user experience by making it more efficient, secure, and tailored to your preferences, as well as for marketing objectives.
We are an Amazon Associate and earn commissions from qualifying purchases. Our participation in the Amazon Services LLC Associates Program, an affiliate advertising initiative, provides us with a means to generate income through links to Amazon.com and its affiliated websites. Please note that Amazon, Amazon Prime, their logos, and the Amazon Prime logo are registered trademarks of Amazon.com, Inc., or its associated companies.